Pages

Sunday, May 8, 2011

A Happy Mother's Day


I still have yet to post photos of Keeley's dedication service, but I do have the photos of the cards I made for Mother's Day. Here is one I gave to a dear friend of mine, Tracy.


I created the print on my computer and then printed it off to make the card. Then I made some flower hair clips (tutorial here) and clipped them through the card. That way, Tracy can also use the flowers on a belt, in her hair, on a scarf, etc.

This is the one I made for my mom:


I stayed up way too late the night before Mother's Day, but I had a lot of fun making them. Unfortunately, I didn't get cards out on time for other relatives. Something I have to do TODAY! (Better late than never, I suppose.)

I feel so blessed to have such wonderful children and such an actively supportive family. My mom is truly a blessing to me now and has always been an excellent and beneficial influence in my life. She taught me (along with my dad) to love the Lord and to love others. The two most important lessons in life. Thank you, Mom!

Satin Flowers and Favorite Finds


This week has been crazy. I have done projects, worked, taken care of kids, gone out, and much, much more. But it's been a good week! This morning, we dedicated Keeley to the Lord and it was so sweet! I'll post some photos later this week. (My dad took a lot of photos and I have yet to get the photos from him.)

Earlier this week, my little sis had her Freshman Prom. I helped her get ready and took some photos. But what I really wanted to show here is the headband that I made for her after I learned how to make satin flowers from this lovely lady's blog tutorial.


I love how it turned out and I LOVE how the photos of her turned out. It's so easy to take good photos when you have a subject this easy to take photos of!

I'm going to try to post some more photos of projects I did this week later on. For now, I'll leave you with some links to blogs I discovered this week.


Designer blog with super cute photos and ideas.

Inspiration and design.
Cute crafts and design ideas.

Crafts, tutorials, and great photos!
Inspiration for cute things to make, food info, good photos, etc.
(Going Home to Roost)
Beautiful paper and stationary blog with lots of ideas.

Over and out for now!

Thursday, May 5, 2011

A Paint Party


Some of the girls in my Sunday school class got together to do a paint party. At a paint party, an art teacher comes in and gives a group of people detailed instructions on how to do a painting. We had a great time and the thing I loved about it was hanging out with the girls and seeing how everyone's painting turned out so different, even though we were all doing the same pattern. Here's how it went:

We all got there and dropped our purses in the entryway.
We chatted for a while and then got started on the project. We were each given a blank canvas (textured with spackle), three paintbrushes, and a styrofoam plate with several paint colors.


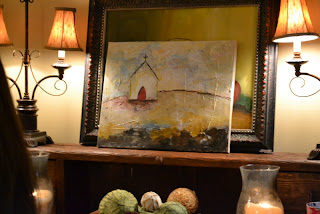
The goal was to make it look like this:

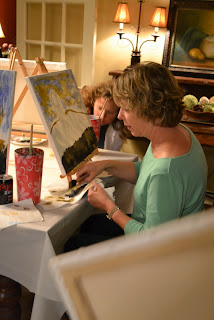
Of course, we chatted while we worked...

...but we made some progress anyway

We worked...

and worked...

(and chatted some more)

and worked...

to make it look like this:

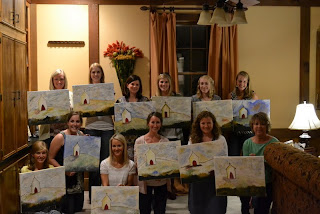
Everyone's turned out awesome...


and Jenny's cupcakes were super cute too! I heard (sadly, I didn't get to try them) that they had bavarian chocolate filling. (What a nice surprise!)

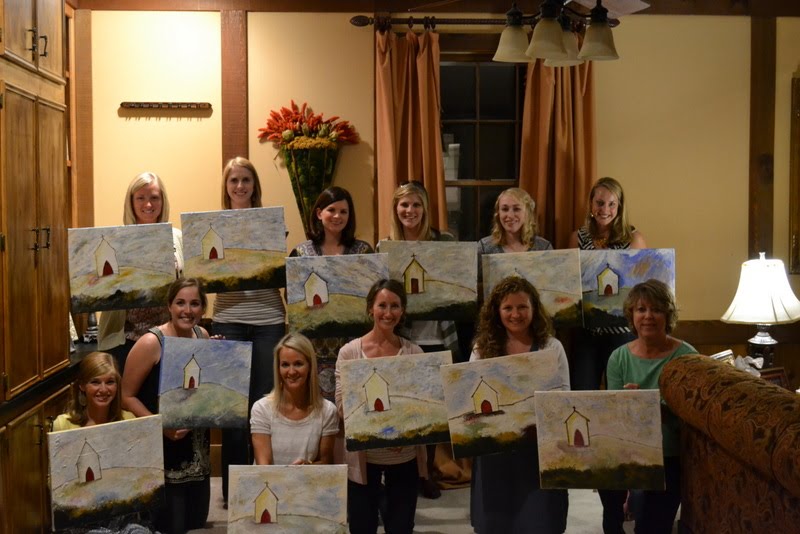
And here we are... all done! Grrr... my painting is the only one in the photo that got covered. Oh well! I guess you'll never know whether or not I'm a good artist! ;-)


Wednesday, May 4, 2011

A Spiderman Pillowcase


Yesterday, when we went to Hobby Lobby, my son spied this Spiderman fabric. Even though he is three, he is totally loves by superheroes. Spiderman is one of his favorites (evidenced by his Spiderman birthday party). He has been begging me ever since we bought the fabric yesterday to sew his pillowcase. I don't have a sewing machine at the moment, so I borrowed my mom's. The tension was messed up, but my awesome husband spent a little while looking at it and had it whipped into shape.

I started by laying a regular pillowcase on top of the fabric as a guide to cut out the correct shapes. I made sure to leave seam allowances (usually 5/8").

At the top, I also made allowance for the larger seam allowance that looks like this on a regular pillowcase:
I could have cut one long piece of fabric so that I didn't have to sew the bottom of the pillow (just folded it), but my fabric wasn't long enough. So I just cut two pieces (one for each side of the pillow).


Then I ironed the very top down so that there wouldn't be a raw edge at the top of the pillow case on the hem.

I did a second fold and ironed that down (about 3 1/2 inches). Just like the original pillowcase.

I did that to both pieces of fabric. Then I sewed that down.

Finally, I put the laid the fabric together with the outsides of the fabric facing each other (wrong side out), and sewed the three sides. I started by making sure that the top of the pillowcase (where you insert the pillow) was even and sewed the side seam first.

This is what it looked like when it was done.


And this is what my son looked like (except even happier) when it was finished. Super simple project, super happy kid! Totally worth it!

Reupholstery for Beginners (+ books to read)


Yesterday, I spent most of the day at the DMV helping my lil sis, B, get her driver's permit. Yay! She passed the test! Later that evening, I did the following project.

My friend, Christina, suggested a while back that I could reupholster my piano bench for a simple and cute change to my living room. (She has so many great ideas!) I've considered it for a while, but until yesterday, had not found any fabric that I really loved. Below is the before and after. Scroll down to see how I did it.

Before


After


My sisters and I went to Hobby Lobby yesterday afternoon and I found this fabric that I LOVE!

(You'll see a better photo of it at the end of this project.)

Here are the tools I used to recover the piano bench:

I used a philips head screwdriver to take the top off of the hinges. Then I used a flat head screwdriver to loosen the existing staples that were used to upholster it.
Then I used pliers to remove the staples completely.
After I got the original piece of fabric off, I used it to measure and cut out the new piece of fabric.

(I did a lot of this project in my 3 year old's room since he is recently having trouble going to bed in his own room and is comforted to have my husband or me in his room as he goes to sleep.)

Next, I laid the bench top on the upside-down fabric and pulled the center of the fabric over tightly (but not too tight). It is best to do the long side first. I used a staple gun, but unfortunately, I had the wrong size staples, so I struggled getting that part right. I stapled from the center of the fabric to the outside corner in order to avoid any bumps.

This is how I folded the corners.


Then I stapled them down.

And here is the finished product.

I love it!
If anyone has tips on better ways to do things (Like, get the right size staples for your staple gun!) or about how to do more complicated projects, please feel free to share!

I hope that one of my upcoming projects will be to paint the piano and bench in a glossy white paint. My husband isn't completely on board yet because he loves natural wood. But I don't love natural wood most of the time and I think that the white would really brighten up the room. If he is okay with it (it is his home too!), I plan to knock it out quickly.

I recently finished this book that was recommended by a couple of different sources...
and loved it. I passed it along to my sister to read.

Here's a book that I'm currently reading and enjoying.
All of Malcolm Gladwell's books make me think. So far, this one is about extraordinary people and how they become extraordinary. I am hoping that he will share some secrets so I can find my own way to do extraordinary things. I don't want to be afraid to do things that are out of the ordinary. Perhaps this book will help give me courage... or at least some practical ideas.

Tomorrow, I plan to post my pillowcase project that I did tonight!